DIY Champagne Wall: Imagine a stunning centerpiece that effortlessly elevates any gathering, a captivating display of bubbly that sets the mood for joyous celebrations. Creating a DIY champagne wall is a fun and rewarding project that allows you to unleash your creativity and impress your guests.
From simple freestanding designs to elaborate wall-mounted creations, the possibilities are endless. This guide will walk you through every step, from planning and design to construction and styling, empowering you to craft a unique and unforgettable champagne wall that perfectly reflects your personal style.
What is a DIY Champagne Wall?
A DIY champagne wall is a creative and stylish way to display and serve champagne bottles at events, parties, or even in your home. It’s essentially a decorative structure that holds champagne bottles in an eye-catching arrangement, adding a touch of elegance and sophistication to any occasion.
Types of DIY Champagne Walls
The beauty of a DIY champagne wall lies in its versatility. You can choose from various designs and styles to suit your preferences and the event’s theme. Here are a few examples:
- Freestanding Champagne Walls: These are independent structures that can be placed anywhere in your space. They are often made from wood, metal, or acrylic and can be customized with different shapes and sizes.
- Wall-Mounted Champagne Walls: These are attached to a wall and offer a space-saving solution. They are typically made from lightweight materials like wood or metal and can be designed to blend seamlessly with your existing decor.
- Rustic Champagne Walls: These feature a more natural and earthy aesthetic, often using reclaimed wood, branches, or other natural elements. They are perfect for outdoor events or gatherings with a rustic theme.
- Modern Champagne Walls: These showcase a sleek and contemporary design, often using metal, acrylic, or geometric shapes. They are ideal for events with a modern or minimalist theme.
Planning and Design
A DIY champagne wall is a visually stunning and functional addition to any event, but careful planning and design are essential for a successful outcome. The design process helps you create a wall that complements your event’s theme, size, and style while ensuring it’s structurally sound and visually appealing.
Size and Shape
The size and shape of your champagne wall are fundamental considerations. They determine the number of bottles you can display, the wall’s overall impact, and its suitability for your event space.
- Consider the space: Measure the available space where you plan to install the champagne wall. Ensure there is enough room for guests to comfortably move around and interact with the wall.
- Determine the bottle capacity: Decide on the number of champagne bottles you want to display. This will help you choose the right size and configuration for your wall.
- Explore various shapes: While rectangular walls are common, you can opt for unique shapes like a circular or hexagonal design for a more eye-catching effect.
Materials
Choosing the right materials for your DIY champagne wall is crucial for both aesthetics and functionality.
- Wood: Wooden boards are a popular choice for building champagne walls. They offer durability, stability, and a natural aesthetic.
- Metal: Metal frames, such as those made from iron or steel, provide a modern and industrial look. They can be painted or left in their natural state.
- Acrylic: Clear acrylic panels can create a sleek and contemporary champagne wall, showcasing the bottles beautifully.
Style and Theme
The style and theme of your champagne wall should align with your event’s overall aesthetic.
- Event theme: Consider the theme of your event, such as a wedding, birthday party, or corporate gathering. The wall’s style should complement the theme, creating a cohesive look.
- Color scheme: Choose colors that complement the event’s color scheme and your chosen materials. You can paint the wall, use colored ribbons or lights, or incorporate decorative elements that match the colors.
- Personal touches: Add personal touches to make the wall unique. This could include incorporating family photos, personalized messages, or decorative elements that reflect your style.
Lighting
Proper lighting can enhance the visual appeal of your champagne wall and create a warm and inviting ambiance.
- Ambient lighting: Use ambient lighting to create a soft and diffused glow around the wall. This can be achieved with string lights, fairy lights, or lamps.
- Accent lighting: Highlight the champagne bottles by using spotlights or LED strips. This adds depth and dimension to the wall.
- Dimmable lights: Choose dimmable lights to adjust the brightness based on the mood and ambiance you want to create.
Materials and Tools
This section will provide a comprehensive list of materials and tools required to build a DIY champagne wall. It will discuss different material options for the frame, shelves, and supports, and provide recommendations for specific tools based on the chosen materials and design.
Frame Materials
The frame is the foundation of your champagne wall. It provides structural support and determines the overall size and shape of the wall. Here are some popular options for frame materials:
- Wood: Wood is a versatile and affordable material for frames. It is easy to work with and can be stained or painted to match your décor. Pine, cedar, and oak are common choices for champagne wall frames. Consider using pressure-treated wood for outdoor applications.
- Metal: Metal frames offer durability and a modern aesthetic. Steel and aluminum are popular choices, known for their strength and resistance to rust. You can find pre-fabricated metal frames or create your own using metal tubing or angle iron.
- PVC Pipe: PVC pipe is a lightweight and inexpensive option for frames. It is readily available in various sizes and can be easily cut and joined using PVC glue and fittings. However, PVC may not be as strong as wood or metal and may require additional supports.
Shelf Materials
The shelves are where you will display your champagne bottles. They need to be strong enough to hold the weight of the bottles and aesthetically pleasing. Consider these options:
- Wood: Wooden shelves offer a classic look and are readily available in various sizes and thicknesses. You can use solid wood planks or plywood for shelves. Choose a wood that is resistant to warping and moisture, such as cedar or oak.
- Metal: Metal shelves can provide a sleek and modern look. Steel or aluminum shelves are durable and easy to clean. You can find pre-made metal shelves or create your own using metal bars or sheets.
- Glass: Glass shelves offer a contemporary and elegant look. Tempered glass shelves are strong and resistant to scratches. However, they can be more expensive than wood or metal shelves and require careful handling.
Support Materials
Supports are essential for providing stability and strength to the champagne wall. These materials are used to connect the frame to the shelves and provide additional support for heavy loads:
- Wood: Wooden supports can be used to create a sturdy and reliable structure. Choose hardwood like oak or maple for greater strength.
- Metal: Metal supports offer strength and durability. Use metal brackets, angles, or bars to connect the frame to the shelves.
- PVC Pipe: PVC pipe can be used as supports, but it may require additional reinforcement for heavier loads. Use PVC pipe fittings to connect the supports to the frame and shelves.
Tools
The specific tools you will need will depend on the materials and design of your champagne wall. Here is a general list of tools that you may find useful:
- Measuring Tape: To accurately measure the dimensions of your champagne wall and the materials you will be using.
- Level: To ensure that your champagne wall is straight and level.
- Saw: To cut wood, metal, or PVC pipe to the desired size. Choose a saw appropriate for the materials you will be using.
- Drill: To drill pilot holes and attach the frame to the shelves and supports. Consider using a cordless drill for greater mobility.
- Screwdriver: To secure the frame, shelves, and supports with screws.
- Hammer: To drive nails or tap wood into place.
- Safety Glasses: To protect your eyes from flying debris during cutting or drilling.
- Work Gloves: To protect your hands from splinters or sharp edges.
Construction Process: Diy Champagne Wall
Now that you have gathered your materials and tools, you’re ready to start building your champagne wall. This process is straightforward and involves a few key steps.
Assembling the Wall
The foundation of your champagne wall is the base. To build it, you’ll need to connect the wood planks to create a sturdy structure.
- Measure and cut: Measure the desired length and width of your champagne wall. Cut the wood planks to the appropriate size using a saw.
- Attach the planks: Securely attach the wood planks together using wood glue and screws. Make sure the joints are tight and secure to create a stable base.
- Reinforce the structure: For extra stability, consider adding cross-braces or supports to the back of the wall.
Adding the Grid
The grid is what will hold your champagne bottles in place. It’s essential to ensure the grid is strong enough to support the weight of the bottles.
- Mark and measure: Measure the spacing between the grid lines. Use a pencil to mark the positions of the grid lines on the base.
- Attach the grid: Attach the grid to the base using wood glue and screws. Make sure the grid is level and securely fastened.
Installing the Bottles
This is the exciting part! You’ll need to secure the bottles to the grid so they’re displayed attractively and safely.
- Prepare the bottles: Before installing the bottles, ensure they’re clean and free of any debris.
- Secure the bottles: Use a bottle holder or a similar device to hold each bottle in place on the grid. Make sure the bottles are securely fastened and won’t fall off.
Finishing Touches
Once the bottles are in place, you can add some finishing touches to enhance the appearance of your champagne wall.
- Decorate: You can add decorative elements like lights, flowers, or ribbons to personalize your champagne wall.
- Add a backsplash: Consider adding a backsplash behind the wall to give it a more polished look.
- Paint or stain: Paint or stain the wall to match your decor or create a desired effect.
Decorating and Styling
Once your champagne wall is constructed, it’s time to make it truly shine. The way you decorate and style your champagne wall will determine its overall aesthetic and how it complements your event or space.
Arranging Bottles and Glasses
The arrangement of bottles and glasses on your champagne wall plays a crucial role in its visual appeal. Here are some tips for creating a balanced and eye-catching display:
- Vary Heights and Sizes: Mix champagne bottles of different sizes and heights to create visual interest and depth. This can be achieved by using standard-sized bottles, magnums, or even mini bottles.
- Create Visual Patterns: Arrange bottles in a pattern or grid to create a sense of order and symmetry. For a more relaxed look, try a more organic arrangement.
- Incorporate Glasses: Add champagne flutes, coupes, or even wine glasses to your display for a more complete look. You can hang them from the wall or place them strategically on shelves.
- Consider the Color Palette: Think about the colors of your champagne bottles and glasses and how they will complement the overall decor of your event or space. For a cohesive look, choose a color palette and stick to it.
Using Accessories
Accessories can add a touch of personality and elegance to your champagne wall.
- Decorative Vines: Artificial vines can be used to create a lush, natural feel. They can be draped over the wall or around the bottles.
- LED Lights: String lights can be used to add a warm glow and highlight the champagne bottles. You can use battery-operated lights for portability or plug-in lights for a more permanent installation.
- Personalized Signage: Add a personalized touch with a sign that includes your name, the event date, or a special message.
- Small Decorative Items: Consider adding small decorative items such as crystals, beads, or faux pearls for added sparkle and glamour.
Lighting
Proper lighting is essential for showcasing your champagne wall.
- Ambient Lighting: Use ambient lighting to create a warm and inviting atmosphere. You can use string lights, fairy lights, or even candles for a more romantic feel.
- Accent Lighting: Use accent lighting to highlight specific features of your champagne wall, such as the bottles, glasses, or accessories. This can be achieved using spotlights, track lights, or even LED strips.
- Avoid Harsh Lighting: Avoid using harsh overhead lighting, as this can make the bottles and glasses look dull.
Other Decorative Elements
Here are some additional ideas to enhance your champagne wall:
- Champagne Buckets: Place a few champagne buckets filled with ice and bottles of champagne on the wall for a functional and stylish touch.
- Champagne Stoppers: Add a touch of personality with decorative champagne stoppers. You can find stoppers in a variety of materials and designs, such as metal, crystal, or wood.
- Floral Arrangements: Incorporate small floral arrangements or single blooms for a touch of elegance. Choose flowers that complement the color palette of your champagne wall.
Safety and Maintenance
Creating a champagne wall involves working with potentially hazardous materials and handling fragile items. Therefore, it is essential to prioritize safety during construction and while using the champagne wall. Additionally, proper maintenance ensures the longevity and stability of the structure.
Safety Considerations
Prioritize safety during the construction and use of the champagne wall. Adhering to safety measures can prevent accidents and injuries.
- Secure Mounting: Ensure the champagne wall is securely mounted to a stable surface. A sturdy wall or a dedicated frame is ideal for preventing tipping or falling.
- Weight Distribution: Distribute the weight of the champagne bottles evenly across the wall. Avoid overcrowding any section of the wall.
- Proper Materials: Use materials suitable for the weight and size of the champagne wall. Choose strong, durable materials like wood or metal for the structure.
- Electrical Safety: If using lights or other electrical components, ensure proper wiring and grounding to prevent electrical hazards.
- Avoid Overloading: Do not overload the champagne wall with too many bottles. This can cause instability and potential accidents.
Maintenance Tips
Regular maintenance is essential for the champagne wall’s stability and longevity.
- Inspect Regularly: Periodically inspect the champagne wall for any signs of damage or loose connections.
- Clean Regularly: Dust and clean the champagne wall to prevent the accumulation of dirt and grime.
- Tighten Connections: Tighten any loose screws or connections to ensure the wall’s structural integrity.
- Avoid Harsh Chemicals: Do not use harsh chemicals or abrasive cleaners on the champagne wall. These can damage the materials.
- Store Properly: When not in use, store the champagne wall in a dry, cool place to prevent damage from moisture or temperature fluctuations.
Champagne Storage and Handling
Proper storage and handling of champagne bottles are crucial for preserving their quality and preventing accidents.
- Storage Conditions: Store champagne bottles in a cool, dark place with consistent temperatures. Avoid direct sunlight or heat sources.
- Storage Position: Store champagne bottles horizontally to keep the cork moist and prevent oxidation.
- Handling Precautions: Handle champagne bottles with care to prevent breakage. Avoid shaking or jarring the bottles.
- Temperature Control: Serve champagne chilled, but avoid freezing it. The ideal serving temperature is between 45°F and 50°F (7°C and 10°C).
- Opening Techniques: Use a champagne opener to carefully remove the cork. Avoid using a knife or other sharp objects.
Alternative Designs and Variations
A DIY champagne wall can be more than just a simple grid of bottles. Explore different designs and materials to create a unique and eye-catching display that reflects your personal style and the occasion.
Here are some alternative designs and variations to consider:
Different Materials
The traditional champagne wall uses wood or metal frames and shelves. However, you can explore alternative materials to create a more unique and personalized design.
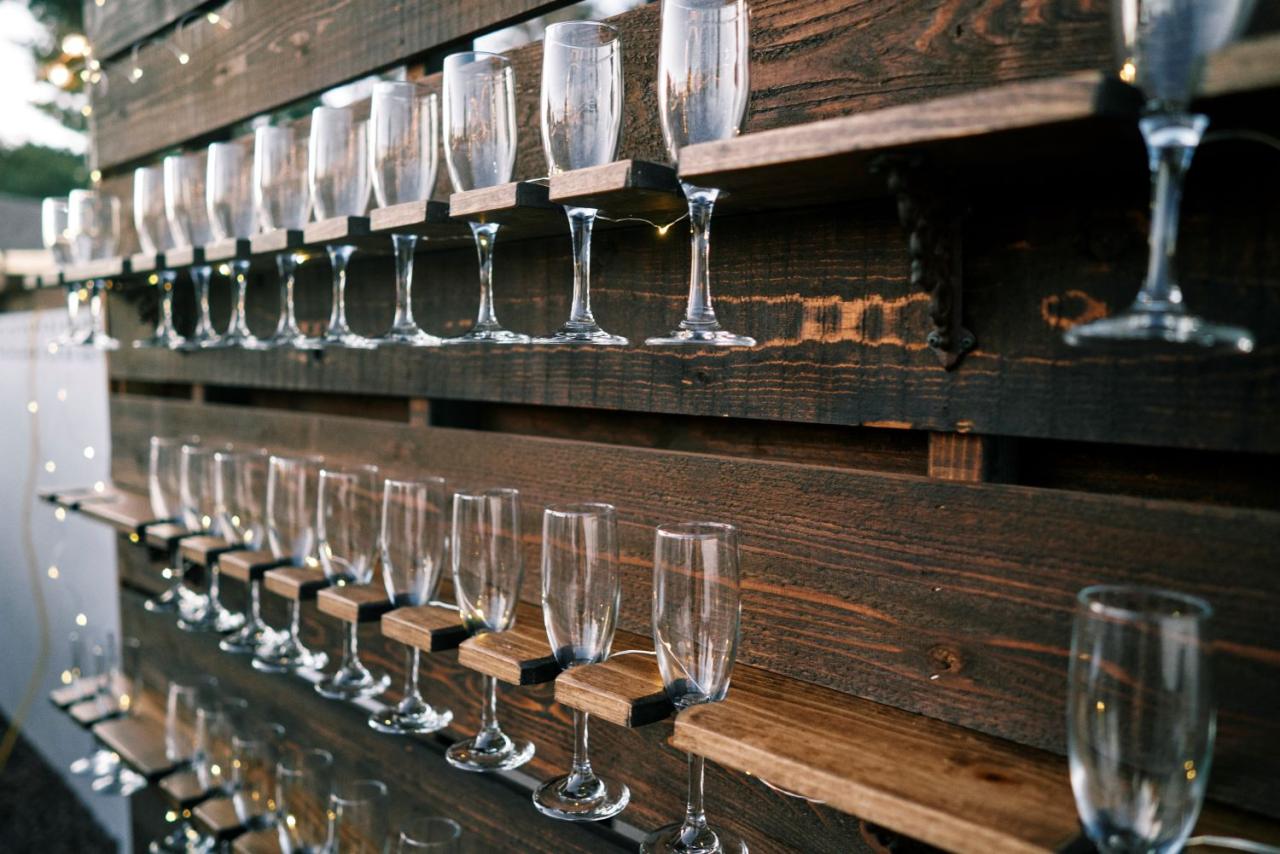
- Recycled Materials: Repurpose old pallets, crates, or even wine barrels to create a rustic and eco-friendly champagne wall.
- Acrylic Panels: Transparent acrylic panels can create a sleek and modern look, allowing the bottles to be the focal point.
- Metal Mesh: Metal mesh panels can provide a contemporary and industrial aesthetic, offering a unique way to display the bottles.
Shapes and Sizes, Diy champagne wall
The standard champagne wall is rectangular, but you can experiment with different shapes and sizes to create a more dynamic and visually appealing display.
- Circular: A circular champagne wall can create a focal point in a room, with the bottles arranged in a spiral or concentric circles.
- Triangular: A triangular champagne wall can be a modern and geometric addition to any space.
- Custom Shapes: Create a champagne wall in a unique shape that reflects your personality or the theme of the event.
Innovative Designs
Get creative with your champagne wall design by incorporating additional features and elements.
- Lighting: Incorporate LED lights or fairy lights to add a touch of ambiance and highlight the bottles.
- Mirror Backdrop: A mirror backdrop behind the champagne wall can create the illusion of depth and make the display appear larger.
- Integrated Bar: Combine the champagne wall with a bar or serving area for a functional and stylish display.
DIY Champagne Wall Ideas for Different Occasions
A DIY champagne wall is a versatile and stylish addition to any event, adding a touch of elegance and excitement. The beauty of a champagne wall lies in its adaptability, allowing you to personalize it to suit the specific theme and ambiance of your celebration.
Wedding Champagne Walls
Wedding champagne walls offer a stunning backdrop for wedding photos, create a visually appealing display for your champagne selection, and provide a unique and interactive element for your guests.
- Classic Elegance: A white or ivory champagne wall adorned with lush greenery, white roses, and crystal glasses exudes timeless elegance. Consider adding a touch of sparkle with silver or gold accents.
- Rustic Charm: For a rustic wedding, a wooden champagne wall with burlap accents, wildflowers, and mason jars filled with champagne would be perfect. Incorporate elements like vintage signage or rustic lanterns to enhance the ambiance.
- Modern Minimalism: A sleek, minimalist champagne wall with geometric shapes, clear acrylic shelves, and simple greenery creates a contemporary and sophisticated look. Use black, white, and metallic accents for a modern touch.
Party Champagne Walls
A DIY champagne wall can elevate the atmosphere of any party, from casual gatherings to formal celebrations.
- Birthday Bash: A colorful champagne wall with balloons, streamers, and personalized decorations creates a festive and celebratory vibe. Use bright colors and fun patterns to match the birthday theme.
- Holiday Cheer: A festive champagne wall with holiday-themed decorations, such as ornaments, garlands, and lights, adds a touch of magic to your holiday celebrations. Consider incorporating elements like pinecones, holly, and snowflakes for a winter wonderland feel.
- Themed Party: A champagne wall can be tailored to match any theme. For a tropical party, use vibrant colors, tropical flowers, and pineapple accents. For a Gatsby-themed party, incorporate art deco elements, metallic accents, and feathers.
Celebration Champagne Walls
Champagne walls are perfect for celebrating special milestones and achievements.
- Graduation Celebration: A champagne wall with graduation caps, tassels, and school colors creates a festive and memorable backdrop for celebrating a graduate’s achievement. Include personalized decorations with the graduate’s name and year of graduation.
- Anniversary Celebration: A romantic champagne wall with candles, flowers, and personalized decorations can be a beautiful and intimate way to celebrate a special anniversary. Consider incorporating elements like photos from the couple’s journey together.
- Corporate Event: A sleek and sophisticated champagne wall with company branding, logos, and corporate colors can create a professional and impressive ambiance for a corporate event. Include personalized signage and decorations to promote the event’s theme.
Budget-Friendly DIY Champagne Wall Solutions
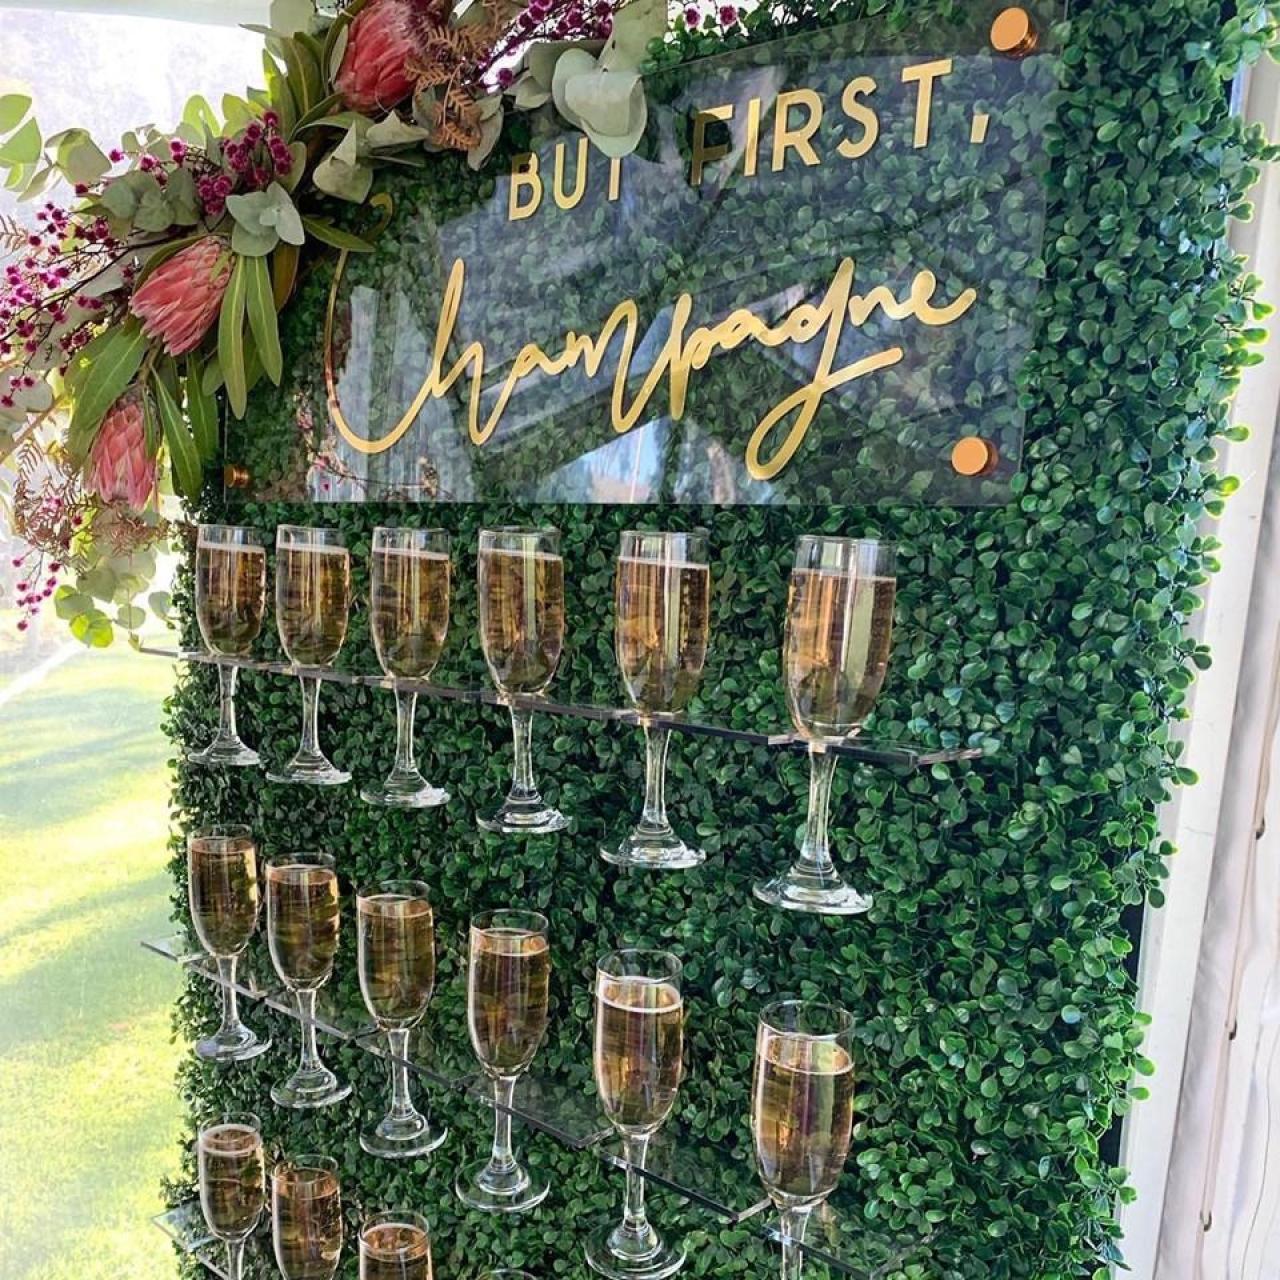
Creating a stunning champagne wall doesn’t have to break the bank. With a little creativity and resourcefulness, you can achieve a luxurious look without spending a fortune.
This section will explore practical tips and techniques for constructing a budget-friendly DIY champagne wall. It will also delve into ways to repurpose materials and reduce costs, and provide examples of affordable DIY champagne wall projects.
Repurposing Materials
Repurposing materials is an excellent way to save money and create a unique champagne wall. Here are some ideas:
- Wooden Pallets: Wooden pallets are readily available and often free. They can be easily disassembled and used to create the framework for your champagne wall. You can paint them in a desired color or leave them in their natural state for a rustic look.
- Wine Crates: Wine crates are another readily available and inexpensive option. They can be stacked and arranged to create a visually appealing display. You can even paint them in different colors to add a pop of personality.
- Recycled Cardboard: Cardboard boxes can be repurposed into champagne wall panels. Cut the cardboard into squares or rectangles, and then attach them to a sturdy base using glue or tape. This method is ideal for creating a temporary champagne wall for a party.
Utilizing Affordable Materials
Several affordable materials can be used to create a budget-friendly champagne wall:
- PVC Pipes: PVC pipes are inexpensive and readily available at most hardware stores. They can be cut and joined to create a grid system for your champagne wall. PVC pipes are lightweight and easy to work with, making them an ideal choice for DIY projects.
- Wire Mesh: Wire mesh is a versatile and affordable material that can be used to create a modern and minimalist champagne wall. It can be easily cut and shaped, and you can attach champagne glasses to it using wire or zip ties.
- Foam Board: Foam board is a lightweight and inexpensive material that can be used to create a sturdy base for your champagne wall. You can cut it into desired shapes and sizes, and then cover it with fabric or wallpaper to achieve a desired look.
Affordable DIY Champagne Wall Projects
Here are some budget-friendly DIY champagne wall project ideas:
- Wine Crate Champagne Wall: Stack wine crates vertically and horizontally to create a rustic and charming champagne wall. You can decorate the crates with paint, stencils, or even attach small pieces of fabric to personalize them.
- Cardboard Champagne Wall: Cut cardboard boxes into squares or rectangles, and then attach them to a sturdy base using glue or tape. You can paint the cardboard panels in a desired color or leave them in their natural state for a minimalist look.
- PVC Pipe Champagne Wall: Cut PVC pipes into desired lengths and join them together using PVC connectors. This will create a grid system for your champagne wall. You can attach champagne glasses to the PVC pipes using wire or zip ties.
DIY Champagne Wall Inspiration
A DIY champagne wall is a fantastic way to add a touch of elegance and excitement to any event. But before you start building, it’s helpful to get inspired by other creative projects. Here are some ideas for unique and stylish champagne walls.
Examples of Unique DIY Champagne Wall Designs
A visually appealing DIY champagne wall can be achieved in various ways, incorporating different materials, styles, and arrangements.
- Rustic Elegance: A rustic champagne wall can be created using reclaimed wood planks or pallets. You can arrange the bottles in a staggered pattern or use metal wire baskets to hold them. Adding greenery or flowers to the wall can enhance its natural charm.
- Modern Minimalism: For a modern look, consider using sleek acrylic panels or metal shelves to display your bottles. A minimalist design can be achieved by using a neutral color palette and keeping the arrangement simple and symmetrical.
- Geometric Patterns: Incorporate geometric shapes into your champagne wall design. For example, you can use hexagonal or square shelves to create a visually interesting display. Experiment with different colors and textures to add depth and dimension.
- Personalized Touches: Personalize your champagne wall by incorporating elements that reflect your event’s theme or your personal style. For example, you could use vintage champagne bottles, decorate the wall with your initials, or include a custom-made sign.
- Interactive Display: Create an interactive champagne wall by incorporating elements that encourage guests to participate. For example, you could set up a photo booth with props or provide a chalkboard where guests can leave messages.
FAQs and Troubleshooting
This section addresses frequently asked questions about DIY champagne walls and provides solutions to common problems encountered during the construction and styling process.
Commonly Asked Questions
This section addresses common questions and concerns about DIY champagne walls.
- What is the best way to secure the champagne wall to the wall?
- How do I ensure the champagne wall is sturdy enough to hold the weight of the bottles?
- What is the best way to prevent bottles from falling or breaking?
- How do I clean and maintain a champagne wall?
- What are some alternative materials I can use for the champagne wall?
- How do I make the champagne wall more visually appealing?
- What are some safety considerations when building a champagne wall?
- How can I make my champagne wall more budget-friendly?
Troubleshooting Common Problems
This section discusses potential challenges and provides solutions to common problems encountered during the construction and styling process.
- The champagne wall is not sturdy enough: Ensure the wall is properly secured to the wall using strong adhesives, brackets, or hooks. Consider using thicker wood for added stability. If the wall is too heavy, consider using a smaller size or lighter materials.
- Bottles are falling or breaking: Use a secure and appropriate bottle holder design. Ensure the holders are securely attached to the wall. Use padding or cushioning to protect the bottles from damage. Consider using a less fragile type of bottle or placing heavier bottles at the bottom of the wall.
- The champagne wall is not visually appealing: Use decorative elements such as lights, flowers, or greenery to enhance the wall’s aesthetics. Consider using a variety of bottle sizes and colors to create a visually interesting display. Experiment with different arrangement patterns for a unique look.
- The champagne wall is not safe: Ensure the wall is securely mounted to the wall and that all connections are strong. Use non-slip mats or padding to prevent bottles from sliding. Avoid placing the champagne wall in areas with high foot traffic or where it could be bumped.
- The champagne wall is too expensive: Consider using less expensive materials like plywood or recycled materials. Use fewer bottles or choose less expensive bottles. Opt for a smaller wall design to reduce the amount of materials required.
Conclusion
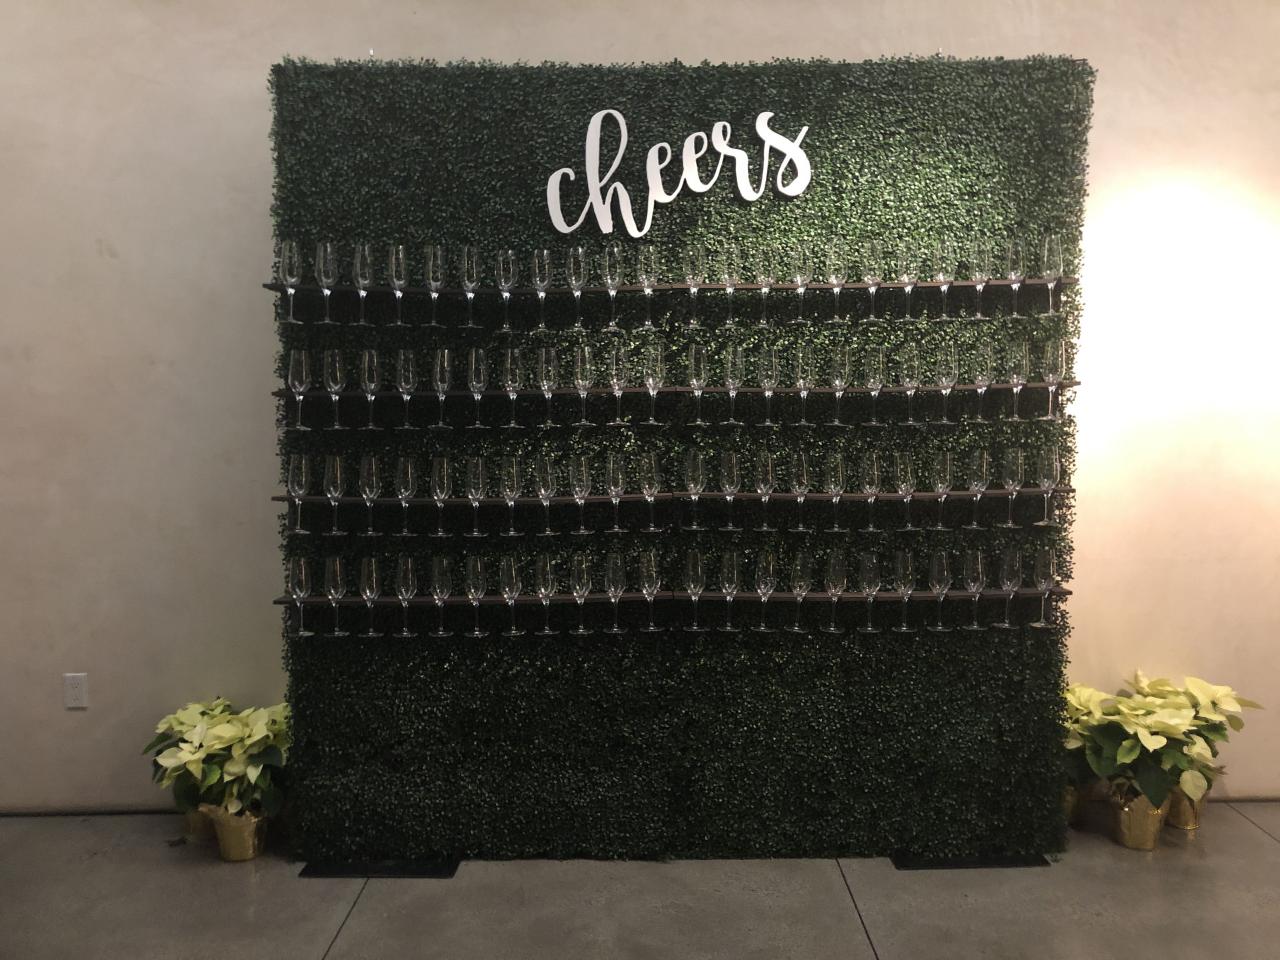
A DIY champagne wall isn’t just about showcasing your favorite bottles; it’s about crafting an experience. With a little planning, creativity, and the right tools, you can transform a simple idea into a dazzling centerpiece that will leave your guests in awe. So, grab your materials, let your imagination run wild, and get ready to create a champagne wall that will make your next celebration truly unforgettable.
A DIY champagne wall is a fantastic way to add a touch of elegance to your home bar or party space. It’s a project that can be tailored to your specific needs and style, and it’s a great opportunity to explore some woodworking project ideas.
Whether you prefer a sleek modern design or a rustic farmhouse aesthetic, a champagne wall is a surefire way to impress your guests and elevate your entertaining game.

