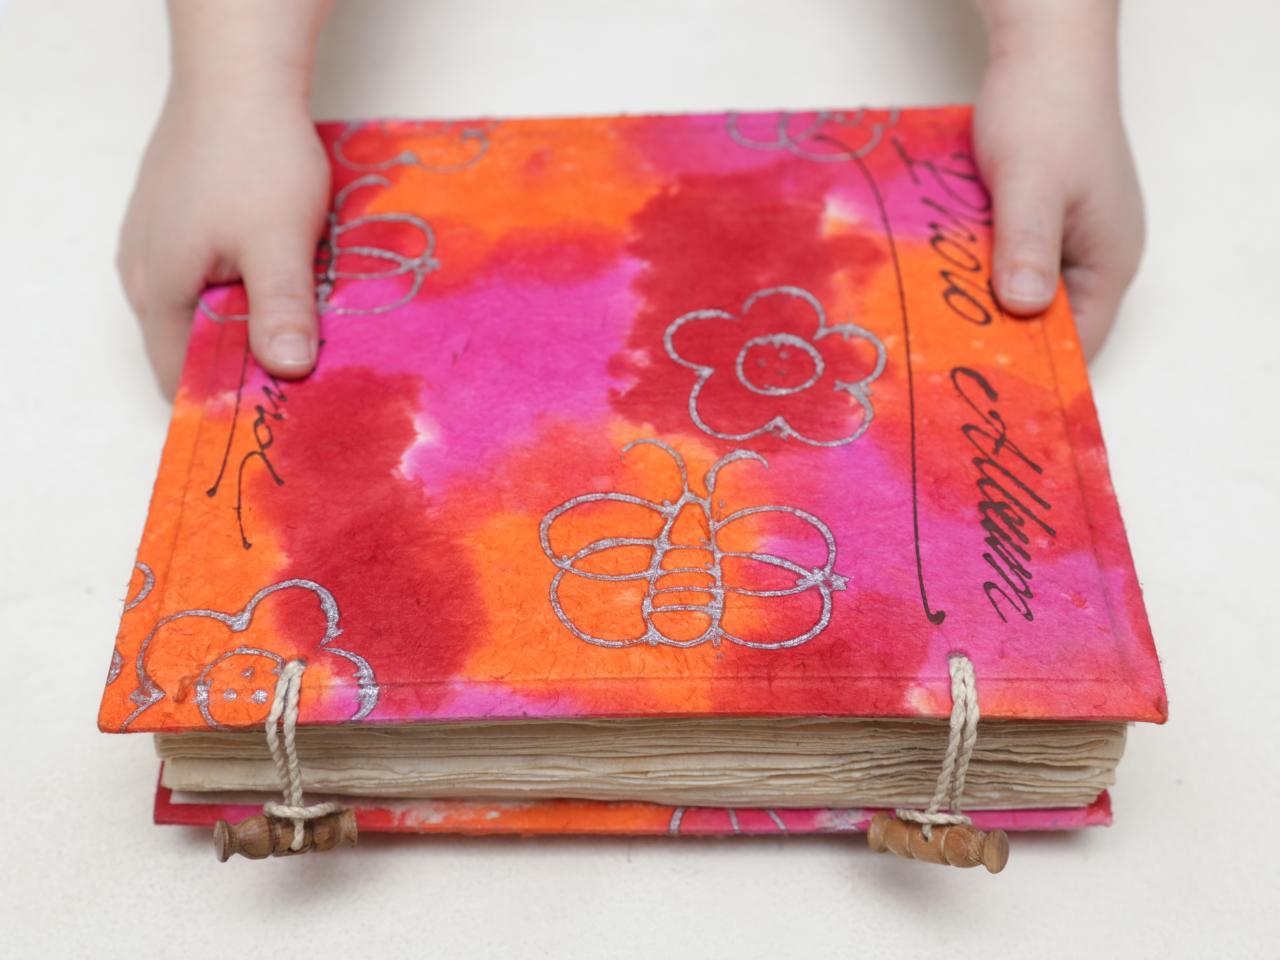
DIY scrapbooking is more than just sticking photos in an album; it’s a creative journey of preserving memories and crafting unique keepsakes. It allows you to express your personality and tell stories through visual narratives, making each scrapbook a personalized treasure.
From capturing special occasions like weddings and birthdays to documenting everyday adventures, scrapbooking offers a fulfilling way to relive precious moments. Whether you’re a seasoned crafter or a curious beginner, the world of scrapbooking has something to offer everyone.
Basic Scrapbooking Techniques
Scrapbooking is a creative and enjoyable hobby that allows you to preserve memories and tell stories through visually appealing pages. It involves arranging photographs, mementos, and embellishments on paper to create unique and personalized albums. Mastering basic scrapbooking techniques is crucial for creating stunning layouts.
Cutting Techniques
Cutting is an essential technique in scrapbooking, as it allows you to shape paper, embellishments, and photographs to fit your design.
- Scissors: Basic scissors are versatile for cutting paper, cardstock, and embellishments. Use sharp, high-quality scissors for clean cuts.
- Paper Trimmers: Paper trimmers are essential for precise cutting and achieving straight lines. They come in various sizes, allowing you to trim paper to specific dimensions.
- Craft Knives: Craft knives are used for intricate cutting and shaping, such as creating borders or cutting out complex designs.
- Die-Cutting Machines: Die-cutting machines are specialized tools that use dies to cut intricate shapes from paper, cardstock, and other materials. They offer a wide variety of designs, making them ideal for adding unique elements to your layouts.
Layering Techniques
Layering is a fundamental scrapbooking technique that adds depth and dimension to your layouts. It involves arranging different elements on top of each other to create visual interest.
- Background Paper: Start with a background paper to provide a foundation for your layout. Choose a paper that complements your theme and color scheme.
- Photos: Place your photos strategically on the background paper, ensuring they are the focal point of your layout. Experiment with different sizes and arrangements to create visual balance.
- Embellishments: Add embellishments to enhance your layout and create visual interest. These can include stickers, ribbons, buttons, flowers, and other decorative elements.
- Journaling: Incorporate journaling to add personal touches and tell your story. Write about the memories captured in your photos or the events that inspired your layout.
Adhering Techniques
Adhering techniques are crucial for securing elements to your scrapbook pages. There are various methods to choose from, depending on the weight and type of materials you’re working with.
- Adhesive Runner: An adhesive runner is a convenient tool for adhering paper and embellishments. It dispenses a continuous strip of adhesive, making it easy to apply and remove.
- Glue Sticks: Glue sticks are ideal for adhering lightweight materials, such as paper and cardstock. They are easy to use and create a strong bond.
- Liquid Glue: Liquid glue is versatile and can be used for a variety of materials. It dries clear and provides a strong bond, but it can take some time to dry.
- Double-Sided Tape: Double-sided tape is a great option for adhering heavier materials, such as chipboard or thick embellishments. It provides a strong hold and a clean finish.
Tips for Organizing Scrapbooking Materials: Diy Scrapbook
Keeping your scrapbooking supplies organized can make a big difference in your creativity and efficiency. A well-organized workspace helps you find what you need quickly, inspires new ideas, and keeps your projects moving smoothly.
Using Storage Containers
Storage containers are essential for organizing scrapbooking materials. They come in various sizes and shapes, allowing you to store everything from paper and embellishments to tools and adhesives.
- Clear containers are ideal for seeing what’s inside, making it easier to find specific items.
- Label your containers with clear and concise labels, using categories like “Cardstock,” “Embellishments,” or “Tools.” This helps you quickly identify the contents of each container.
- Use dividers within larger containers to separate different types of supplies, such as different colors of cardstock or categories of embellishments.
Utilizing Labels
Labels are crucial for a well-organized scrapbooking workspace. They help you quickly identify the contents of your containers, drawers, and shelves.
- Use different colors for different categories, such as blue for cardstock, green for embellishments, and red for tools.
- Use a label maker to create professional-looking labels with clear fonts and sizes.
- Label your shelves and drawers to easily locate specific supplies.
Designing a Visual Guide for an Organized Scrapbooking Workspace, Diy scrapbook
A visual guide can help you visualize how to organize your scrapbooking workspace. Here’s a sample design:
- Designated Work Area: A dedicated workspace with a comfortable chair and ample lighting is crucial for effective scrapbooking.
- Storage Shelves: Use shelves to store larger items, such as paper pads, albums, and storage containers.
- Drawers: Utilize drawers for smaller items like embellishments, ribbons, and adhesives.
- Rolling Cart: Consider a rolling cart for frequently used supplies, making them easily accessible while working.
- Wall-Mounted Storage: Install wall-mounted organizers or pegboards to hang tools, scissors, and other frequently used items.
Benefits of a Well-Organized Workspace
A well-organized scrapbooking workspace offers numerous benefits, including:
- Increased Productivity: A clutter-free workspace helps you focus on your projects and reduces time wasted searching for supplies.
- Enhanced Creativity: A visually appealing and organized workspace inspires creativity and encourages new ideas.
- Improved Efficiency: An organized workspace streamlines your workflow, allowing you to complete projects faster and more efficiently.
Scrapbooking for Beginners

Scrapbooking is a fun and rewarding hobby that allows you to preserve memories and create unique keepsakes. It can be a great way to express your creativity and share your experiences with others. Whether you’re a complete beginner or have some experience, there are many resources and tutorials available to help you get started.
Getting Started with Scrapbooking
The first step is to gather the basic supplies you’ll need. This includes a scrapbook, paper, photos, embellishments, and tools. You can find these supplies at craft stores, online retailers, or even at your local dollar store.
- Scrapbook: Choose a scrapbook that is the right size for your needs and that has a style you like. There are many different types of scrapbooks available, including traditional albums, journals, and even digital scrapbooks.
- Paper: Scrapbooking paper comes in a wide variety of colors, patterns, and textures. You can use plain paper, patterned paper, or even textured paper. There are also specialty papers that are designed for scrapbooking, such as cardstock and textured cardstock.
- Photos: The photos are the heart of your scrapbook. You can use printed photos, digital photos, or even Polaroids. Make sure to choose photos that are high quality and that you love.
- Embellishments: Embellishments are the little details that make your scrapbook unique. They can include things like stickers, ribbons, buttons, charms, and even die cuts. You can find embellishments at craft stores, online retailers, or even at your local dollar store.
- Tools: You’ll also need some basic tools to get started with scrapbooking. This includes scissors, a ruler, a cutting mat, and a glue stick. You may also want to invest in a paper trimmer, a scoring tool, and a hole punch.
Ultimate Conclusion

As you embark on your scrapbooking journey, remember that there’s no right or wrong way to create. Embrace your creativity, experiment with different techniques, and enjoy the process of bringing your memories to life. With a little effort and imagination, you can craft personalized scrapbooks that will be cherished for years to come.
DIY scrapbooks are a great way to preserve memories and tell stories, but sometimes you need a little extra help to organize your digital files. If you’re working with sensitive information, consider using a secure terminal emulator like SecureCRT to manage your digital photos and documents.
Once you’ve got your digital assets in order, you can focus on creating a beautiful and meaningful scrapbook that will be cherished for years to come.


